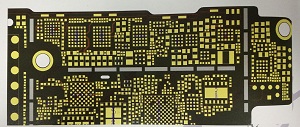
As of the water damaged, this iPhone 7P can't show normally which half bright and half dark.
The first step ready work is to check the voltage and current, then we will know which failure happened in this phone.
Repair process
1 After we got the value ,we need to use JM-P01 Essential Toolkit to disassemble the iPhone, remove the iPhone motherboard and then put observe it under the VGA Camera 7-45X Trinocular Stereo Microscope, there has traces of water, and many small original components have been torn down.
Picture 10-1-1
2 Connect iPhone motherboard to the computer with C48 MFI USB Cable, there is no response. With the help of YH898D hot air gun and tweezers, we remove the iPhone NAND Flash, and then connect it to computer again, still no response.
3 Use Fluke 15B+ Digital Multimeter to measure the booting power supply and I2C bus, the data is normal. Now we start checking the disconnected iPhone NAND flash that without connecting to the computer. Remove USB tube U4001, measure the resistance of the substrate, we found the E4#(PMU-AOP-TRISTAR-ACTIVE-READY) is short circuit.
4 Open the WUXINJI Dongle to check the iPhone schematic diagram; We can know that this point is connected to the CPU display IC U3703 C2#. So we remove the U3703, and then measure the C2# and U4001 E4# again, the short circuit fault has been resolved.
Picture 10-1-2
The Last Three Steps:
2 Replace a good U3703
3 Test the current and voltage
After we get the normal value, we boot it again and wait for 10 minutes, everything is okay which means the fault was repaired.
Picture 10-1-3


No comments:
Post a Comment