Friday, August 31, 2018

Use Professional Tools to Fix iPhone 6S Wake Up Failure

One of our customer sent his iPhone 6S to us, according to the attached file, we knew there happens display problems, but it can be turned on normally.

We disassembled it and found there miss some bottom screws, so there may happens some short circuit. And we knew it was repaired before, so have to pay more attention on this.

Considering this iPhone has a low chance of failure,so we start to repair from the simplest way, try to replace the iPhone display assembly. After replacement, test the iPhone for 2 days, it doesn't have any problems. However, after 2 days, test the iPhone again, the fault is back, seem the real problem is on the iPhone motherboard.

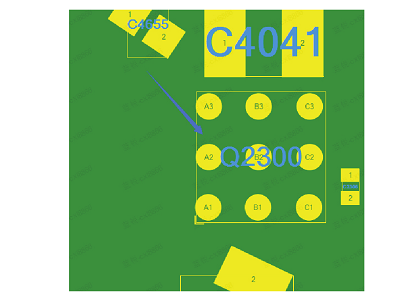
Take off the iPhone motherboard, put it under the Stereo Zoom Microscope to observe, we found the repair trace.

Picture 20-11-1

Looks the previously repair shop also repaired this circuit, use digital multimeter to measure the resistance value of displace interface, the problem was found quickly.

Picture 20-11-2

The data measured for 11 pin is 450, but the 9 pin is 390, it is obviously wrong. Measuring the other end of the conductor, the resistance is 390, until now we can confirm that the conductor is damaged or there is a virtual weld. Re-welding the conductor by using QUICK 861DW hot air rework station, and then measure the resistance for both pins, all is 390. Assemble the iPhone, and test it for few days, the iPhone 6S works properly, the problem of not waking up has been repaired!

Thursday, August 30, 2018

Solutions for iPhone 7 Plus camera problems

Got the repaired iPhone 7 Plus,  we found it was repaired before. So we doubt there may exist something abnormal inside of the phone body, cuz the former problem is about the phone audio IC, which ask a simple solder operation.  

Anyway, we need to disassemble it and check the current, compared it with the normal value,  we advise the wuxinji dongle.

According to previous repair experience, we know there are 2 camera power supply transfer tube on the WIFI IC are easy to virtual weld, after remove it, and reinstall it, the failure still there.

Picture 20-10-1

Use digital multimeter to measure the grounding resistance value for iPhone rear camera J3001 and J4501, the data is normal. And the power supply for camera socket tested also is normal. 

Picture 20-10-2

Measuring the I2C bus on J3001 and J450,when measured the J3001 2 pin, finding that it only has 0.4V voltage, but in the normal case, the normal voltage of I2C bus should be around 1.8V. Open the WUXINJI Dongle to check iPhone schematic diagram, this I2C bus via safety resistor R3301 to M2600, pull-up supplied by R4604 resistor.

Picture 20-10-3

Combine iPhone bitmap to find R4604 resistor.

Picture 20-10-4

One side of the resistance value measured of R4604 is normal, the other side is 0.4V, which is obviously wrong,we suspect the pull up resistor is damaged. With the help of the QUICK 861DW hot air rework station and tweezers, we replace the pull up resistor, and the measure it again, now the both sides voltage of resistor are back to normal.

Picture 20-10-5

Enter the systems and test it, the failure has been repaired!

Wednesday, August 29, 2018

Solutions for iPhone 6 Display Problems

A strange phenomenon happens here,  iPhone 6 display can't work normal while the other function shows normal. So it means there is a doubt that the phone display control IC happens abnormal, as for the phone motherboard, we can't judge it now.

So we decided to disassemble the iPhone motherboard, and observe it under the Stereo Zoom Microscope, we found there are many solder paste on iPhone display socket and iPhone touch socket.


Picture 20-9-1

Is the iPhone LCD screen not display because the socket is not clean? First we use BGA clean water to clean the iPhone motherboard. Because the customer said that iPhone LCD screen also is half bright and half the screen black state, so, after cleaning, we can use digital multimeter to measure the grounding resistance value for the J2019 display socket 1 pin PP_LCM_BL_CAT2_CONN and 4 pin PP_LCM_BL_CAT1_CONN, these two pins will cause iPhone screen half bright and half black problem. We found the resistance value of 4 pin is 2111, which is abnormal, the normal resistance value is about 570.


Picture 20-9-2

After a short connection of the FL2025 fuse inductor, the resistance tested is normal.

Picture 20-9-3

Assemble the iPhone display screen and test it, the Apple logo can be displayed normally, but the backlight still not bright. We noticed that the CPU shield cover was been moved, remove the CPU shield cover, we found the CPU was been repaired. Now, it's easy to explain, the U1502 backlight IC is virtual welded when blowing the CPU by QUICK 861DW hot air rework station, and it leads the iPhone LCD screen sometimes bright and sometimes not. Also, there are many solder paste and tin balls, which is easy cause iPhone motherboard to short circuit.

Picture 20-9-4

Clean up the tin balls and solder paste, and then remove the iPhone backlight IC. There is a good way to remove the iPhone backlight IC, remove the three filter capacitors above the backlight IC, and then the iPhone backlight IC is easy to remove.

Picture 20-9-5

Reballing tin and then install the chip, assemble the iPhone and test it, the fault has been solved.

Tuesday, August 28, 2018

Detail solutions for iPhone 6P charge problem and error-1

Fault Description: iPhone 6P can't be charged and reports error-1 when reflashing

After we got the iPhone 6P , we knew that there happens something abnormal on phone charging. And we decide to re-flash it, but it reports error-1. So we have to disassemble the motherboard.

From our ever repair case,  it is a great possibility to be caused by baseband circuit or baseband chip, open the ZXW team and use the multi-meter, we tried to find the questioned parts.

First step we need to do is to remove the shield, we found that the motherboard is corrosion, which found in the  iPhone charging IC.

Picture 1

After cleaning the motherboard, replace the baseband power supply and charge IC.

Reflash the iPhone, it can not be charged after entering the system, after plugging in the data cable, it prompts does not support this accessories.

According to past repair experience, this fault is caused by the lack of power supply condition of USB chip.

While testing USB operating conditions we found that PP_TRISTAR_PIN power supply has no voltage on the Fluke digital multimeter, this power supply is converted from Q1701, after removing the Q1701 we found that the pad was seriously corroded, so we directly use jumper wire to short connect Q1701 2 pin and 3 pin.

Picture 2

Enter the system to test, charge function is normal now. Other functions are also normal, repair is over here. 

Monday, August 27, 2018

Solutions for iPhone 6S leakage failure

Got the iPhone 6S, we know there happens something abnormal.

When it is a whole,  we can't boot it. But after we disassembled it, use the adjustable phone power supply cable, it can be used normally, so we doubt there happens U2 connector something wrong.

The voltage of iPhone battery socket tested only has 0.6V, according to our repair experience, it is caused by U2. Remove the iPhone U2 IC, but the iPhone is still leaking 100mA, the resistance value of the bottom pin measured is normal.

Picture 20-5-1

Replace the new iPhone U2 IC, assemble the iPhone to test, it charges normally, after a while, even if we don't use the iPhone, but the iPhone battery still consumes fast, we need to find out where the leak is.

Take off the iPhone motherboard again, connect it to DC power supply and test it, after heating a while, we can feel the overheat place,the iPhone WIFI IC is overheat. 6S and later iPhone wifi are bound together with the iPhone Nand flash(W006), we have to remove the iPhone Nand flash and untied WiFi,so we can replace the iPhone WIFI IC. After remove the iPhone WIFI IC, test the iPhone again, now the iPhone doesn't leak.

Picture 20-5-2

Measure the iPhone resistance value by digital multimeter, the data is normal, now we can sure that the iPhone motherboard is fine, the iPhone leakage is caused by a damaged WiFi IC. Protect the other components next the iPhone Nand flash, use QUICK 861DW hot air rework station to remove the iPhone Nand flash, and then untied WiFi.

Picture 20-5-3

Clean up the solder pad, and then use JC Pro1000s programmer to untie the WIFI. Now, soldering the new iPhone WIFI module IC and iPhone Nand flash, and then install them. We have known that after replace the new IC, we can't use turn on iPhone by iPhone battery, we need to connect it to DC Power supply to turn it on, so this will avoid short circuit to burn components. Untied WIFI doesn't need to flash the iPhone, the data of iPhone Nand falsh won't lost. If you are not good for remove the iPhone Nand flash, you can backup it before remove it.

Install the iPhone, all functions tested are normal, the repairs end!

Saturday, August 25, 2018

Solutions for iPhone 5 Se reboot failure

After we got the phone, we found we can't reboot it no matter what did, so we guess there happens circuit abnormal.

Use the DC power supply to check it, of course, we have opened the ZXW dongle to confirm the point we will check it  

After that, we  remove the motherboard and feel the hot position with your hands. However, the location of the heating part is not obvious.

The circuit is converted from battery to main power supply through the conversion tube Q2300.


Picture 1

Remove the Q2300 and measure the grounding resistance with the Fluke multimeter to see if there is a short circuit in the battery or the main supply. It is found that there is a short circuit in the main power supply connecting component by value evaluation.

Rosin some rosin on the main power supply connecting component again. The C2331 melts instantly when the single circuit is energized.


Picture 2

It seems that the fault point is here, so we remove the capacitor C2331 by QUICK hot air station and measure the resistance again,  the resistance value is normal now, re-install the Q2300 and power-on trigger the iPhone, it can reboot normally.

Here, the iPhone SE repair is over. 

Thursday, August 23, 2018

Solutions for iPhone 7P error 56

Today we will talk about iPhone 7P error 56, which shows the display iTunes icon, 

According to our experience, there is no abnormality in the resistance value of the power supply of each circuit of the camera.

Check the NFC section, there is a common fault in the iPhone 7P. The NFC power supply tube in the upper left corner of the CPU can be connected short first.
Picture 1

Short connect the A1 and A2 pin on the NFC power supply pipe, then restore to test after short connection. This iPhone 7P is still not able to pass after that, so we can only take NFC to test.


Picture 2

It is no problem to test the resistance of the socket by Fluke digital multimeter, reball the NFC module with iPhone BGA reballing stencil, install the NFC module and restore the phone after installation, but the mobile phone does not carry out the second self-examination and jump to iTunes, computer display recovery mode. There was no such situation before, so the first thing was to go out and exclude it. In order to prevent the external device from entering iTunes directly in the case of short circuit, when the computer exits the recovery mode, the iPhone volume flex cable and the tail plug flex cable interface are still not touched.

We did not expect this will happen on other places, the system is the latest, just choose to retain data to restore the machine, then discuss with the customer to decide a new reflash without retaining data, it gets normal access to the activation interface.

Summary: This 7P error 56 is due to NFC module virtual welding, keep the data on the phone does not enter the system which is due to the original system exists damaged files. 

Wednesday, August 22, 2018

Find the solutions for iPhone X not charging

After talking with the customer, we know that the iPhone X can't be charged after dropped from the floor. And according to the dialogue, we knew the charge icon displays normally, while we have checked it.

So we have test it before we decide to disassemble it.

After testing, the iPhone X charge icon can display normally,but iPhone power percentage is getting less when it in charging, this is actually a not charge failure. According to our repair experience, for the dropped damaged iPhone, the L3340 and L3341 inductors of the iPhone charge IC are easy to empty weld and pin missing.
picture 1

Connect iPhone charging cable to the iPhone X tail plug flex cable, and then test the cathode of iPhone battery by UNI-T UT658 USB Tester, no voltage was found, so we judge the fault is in the charging part. If you want to delve into it, we have to measure it hierarchically, the AP part as shown in picture.
Picture 2

The external conditions measured are normal, according to our experience, we suspect that the inductors are empty weld and pin missing. Use QUICK 861DW hot air rework station and tweezers to remove the L330 and L3341 inductors, the pins of inductor are on the solder pad, it's like IPhone7, and the inductors are easy to empty weld and missing.

Put it under the microscope, and then replace the new inductors( note: if replace it with iPhone 6 inductors, you need to insulate it,otherwise, it's easy to short-circuit.)
Picture 3

Measure it by iPhone X logic board test fixture, the functions tested are normal. Connect iPhone with UNI-T UT658 USB Tester, the current all is normal, the fault has been repaired.

Tuesday, August 21, 2018

How to solve iPhone 6 Wi-Fi faults

Today we will talk about iPhone 6 Wi-Fi chip. While the problem shows that the iPhone 6 can't connect Wi-Fi.

But what we find is that the phone don't install an iPhone Wi-Fi chip, we have to check it and re-install it.

It enters into the activation mode again after using for a while , which is usually baseband power output short circuit based on our usual maintenance experience. Considering the WIFI removal situation, associated with the WIFI edge of the GPS power amplifier has a voltage output baseband power.

Measure with a FLUKE digital multimeter, it's PP_LDO13 as shown in picture.


20-2-1

After eliminating the short circuit, the result is that the C5129 is broken, the resistance is back to normal, connecting Aisi assistant we find the baseband out. Using Ace assistant to skip WIFI, activate the backward menu again and use it properly.


20-2-2

Now let's fix WIFI. It's OK to measure the resistance. Install it on a WIFI and find it still hard to turn on. After borrowing 1.8V to reset, it is found that the WIFI address appears, but still can not turn on it. Use the Digital Storage Oscilloscope to measure the 32K clock test point we found no waveform.

The clock is from the main power source, so we replace the main power to measure again.

Now the waveform appears, test WIFi again, the fault is successfully solved.


20-2-3

Monday, August 20, 2018

How to repair iPhone 6 Plus touch failure

Got the iPhone 6 Plus, we knew that the phone was dropped by chance, my friends sent it to me for a cost saving, so i will try my best to do it well.

Then, let us start, first step is to check the M1Pin, which mainly stands for the touch function running.

M1 pin easy disconnect is a common failure for the iPhone 6 Plus, whatever iPhone is a drop or used a long time, this should be a design flaw in the motherboard. M1 pin is the sync signal from iPhone display screen to touch communication, the symptom of this failure is that sometimes the touch is completely not working, and there are white lines appear above the iPhone display screen.

Start to measure. After turn on iPhone, and touch function and display function tested are normal. In this case, there is a way that touches this position of the front socket by your fingers (because the back is the iPhone black touch IC), if there are some problem on M1 pin, then the failure will be shown clearly.

Picture 1

After the test, the failure has been shown, start to repair.

Disassemble the iPhone, the iPhone motherboard is good, the iPhone battery has been replaced.

Remove the U2404 black touch IC, we found the MI pin doesn't disconnect, but almost disconnect. Use BGA blade to pry the copper on the upper left corner, apply some tin on it, use QUICK 861DW hot air rework station to re-connect a copper wire to the solder pad, and then apply some green UV oil. Here is tip, with the hot air gun and ultra violet light lamp will make it more solid, the thinner for the green UV oil, the better.

Picture 2
Use the correct temp to reball the black IC, wait it dry and then install it.

We turn on iPhone and test it, the failure was gone, so the repair ends here. If you have any more good idea about this, welcome to leave a comment under the article.


Thursday, August 16, 2018

Solutions for iPhone 6 weak signal problem

Got the repaired iPhone 6, we need to confirm the faults.

From the first scene, there no physical damage and no other outside faults, Wi-Fi function also runs normal. So we have to check the inside.

Use phone opening tools to disassemble the iPhone 6, connect iPhone logic board to the DPS DC power supply to measure its current, the current tested is normal.

Press the iPhone power button to turn on iPhone, get into IOS to check iPhone signal. After measurement, the signal is abnormal, it's very weak.

According to the previously repair experience, there is an inductance L4608 powered by B+ to the iPhone antenna switch, we can open WUXINJI Dongle to check iPhone schematic diagram to find it.
Picture 1

After find out the problem, we need to short connect L4608. Put iPhone logic board under the Stereo Zoom Microscope, use QUICK 861DW hot air rework station to solder a jumper wire on L4608.
Picture 2

Install the iPhone and test it, the iPhone signal is back to normal,now the iPhone signal is full and strong.


Wednesday, August 15, 2018

Guiding for Solving iPhone 6 Compass Problems

After got the phone, we have a talk with its master, we knew that the compass lost his direction,  so, do you know what this means?

We need to fix it.

As a professional phone fix team, we have met too many issues device, contains iPhone, iPad, Apple watch. Anyway, let us start.

Usually the first step we do is to observe the motherboard and find there is no water intake no pressure. Absolutely we need to detect the current by DC power supply, the gyroscope and gravity are both normal just the compass does not rotate.

Then we directly removed the compass u1901ic and measured the pin resistance value, the digital multimeter shows that A4 pin has no resistance.

Compass A4 pin is through u2201 coprocessor B6 pin, so we remove the u2201 and test with the multi-meter, it is found that the two pins are not connected, indicating there is a broken wire.
Picture 1

After careful observation under Trinocular Stereo Microscope, it is found that there are tiny cracks in the screw holes under the GPS.

In case of uncertainty, we find another motherboard and dig it out. Also use the multimeter to check the compass A4 pin and find the wire passes through here.

Then dig it up and the cracks will not be removed. Use the jumper wire to connect.

Using the multi-meter to test the compass A4 pin resistance, the value returns to normal now. Install the IC to test the iPhone 6, all the functions are restored to normal.

Saturday, August 11, 2018

How to deal iPhone 6 no display failure

Got the iPhone 6, according to the attached file, we know there happens some faults on display screen, but there no any broken, we need to diagnostic the inside.

Another words, we need to measure it. Getting the value, we found the display socket 12 pin doesn't have resistance value. Check if the connected c2001 capacitance and fl2034 inductance have corrosion and virtual solder problems, the fl2034 inductance measured are no resistance value.

The fl2034 inductance passes through the U2403 6 pin tube and then to the CPU. Using a digital multimeter to measure the iPhone touch screen control IC U2403 of the corresponding bottom pins, the data tested are normal. So, we can eliminate the CPU problem. In this case, we need to solder jump wire.


Use QUICK 861DW hot air rework station to remove the cover, and then solder a jumper wire from the 6th pin of u2403 to a measuring point next to the screw hole,and then solidify it with green UV oil.

Install the iPhone and test it, the failure has been solved.

Of course, if you have some other more good ideas,  leave a comment on this article, we will be glad to hear different voice.

Friday, August 3, 2018

Solutions for iPhone 6 Charging Problem

Fault description: iPhone 6 not charging problem

After we got it,  we tries to confirm whether the fault is true, we found there no charge symbol when charging.

Put iPhone 6 motherboard under a microscope and then observe it, it is good board, the iPhone tail plug flex cable is good, and the resistance value measured by Fluke 15B+ Digital Multimeter also is no problem.


Picture 1

Because we didn't find the problem after measuring, and according to our experience, we think the iPhone U2 IC might be damaged. Use QUICK 861DW hot air rework station to remove the iPhone U2 IC, and then replace it with the new one.

After replace the U2 IC, measure the resistance value again, the data is normal. So we test the iPhone charge function, the fault still there.

Now remove the iPhone charge tube, and then measure the resistance value, we found the G3 pin is no resistance value.

Check iPhone schematic diagram in the WUXINJI Dongle, we know that the G3 pin is I2c 1 bus, the G3 pin is disconnected, so the iPhone charge tube not working, no resistance value means disconnection. We can fix it by welding the jump wire.


Picture 2

Closest to the iPhone charge tube is the vibrating tube, we weld the jumper wire between them, and then install the iPhone to test, now the problem has been solved.

Another words,  if you found there happens IC problems, you need to measure the resistance value for the pins, then follow the correct procedure, find the faults, get it and solve it.